Modis Reprojection Tool (MRT) - Installation tutorial
- Daniel Romero-Alvarez
- 22 dic 2017
- 4 min de lectura
Actualizado: 5 abr 2021
-_- -_- -_-
CRUCIAL UPDATE 2 (18-09-2020)!!!!: NASA has removed this tool from its website and now is re-directing users to other tools (that I have not explored...). If you are still interested on using this approach and you are a Windows or Mac user (yes, I found the installers in my hard drive), send me an email to send you the executable MRT so you can still follow this tutorial. Thanks to Anastacia Makati for pointing this out.
-_- -_- -_-
Moderate Resolution Imaging Spectroradiometer Images, also known as MODIS, are satellite derive imagery used in multiple applications including species distribution modeling, conservation biology, and public health [1]. The most common way to download this images nowdays is by the website provided by NASA which is intuitive and easy to handle (you can find a tutorial for its use here).
The MODIS Reprojection Tool (MRT) is a graphical user interface designed to align multiple MODIS images (mosaics), reproject, and transform them for their operational use in Geographical Information System (GIS) software. MRT is commonly used after raw MODIS were obtained. One of R script currently implemented to download MODIS images also needs MRT for the correct function of the ‘rts’ package.
In this tutorial (1) we are going to develop a step-by-step guide for the installation of the MRT software for MAC systems and (2) to describe the common MRT functions to manually reproject MODIS. For a windows installation tutorial go to the MORE INFORMATION section.
MRT INSTALLATION FOR MAC SYSTEMS
Pre-installation steps:
1.- Download MRT program for Mac
Before downloading, you will have to create an account. Be sure to have your username and password available since they are necessary to download the satellite images no matter the strategy used.
2.- Establish the directory path of your working system. By default, MAC uses
‘/Users/daniel’ as path,
‘daniel’ in this example being the user session available.
3.- Establish the working directory to install MRT, it could be any folder in the system.
/Users/daniel/Downloads/MRT
4.- Install last version of Java available here
Step-by-step guide:
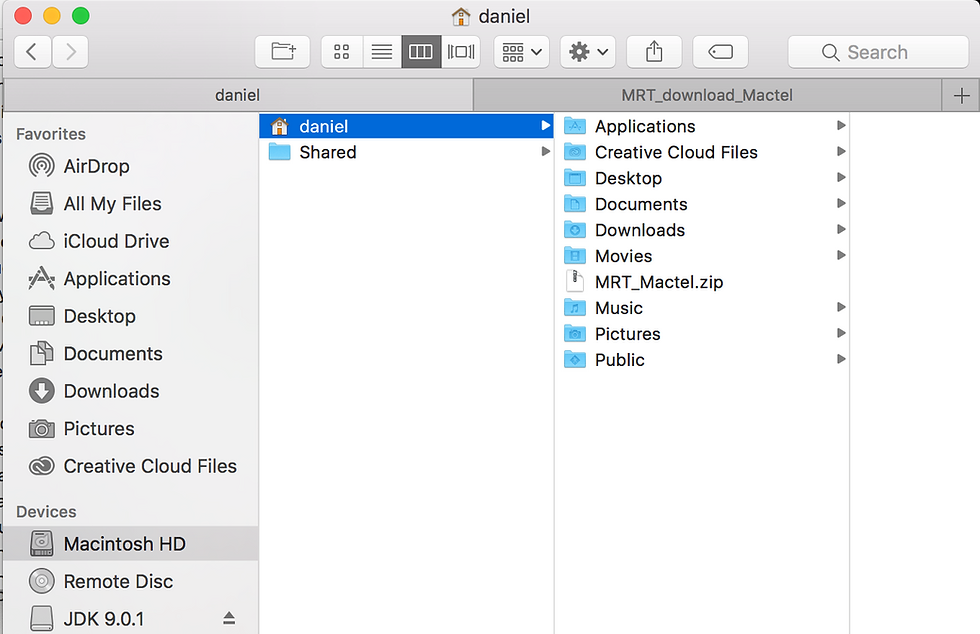
Unzip the file MRT_download_Mactel.zip
After unzip you will have two archives

Copy and paste the compressed file ‘MRT_Mactel.zip’ in the Mac ‘current directory’.
Double click in the terminal file ‘mrt_install’ previously unzipped.
If you did not copy the file to the current working directory you will have the following error:

Copy the file in the working directory or change the working directory to prevent this problem.
If the MRT_Mactel.zip file was correctly pasted in the working directory of your computer you will see the following window and therefore you should press [y] to continue.

Follow up the steps (Basically press [y] and enter each time)
When asked, add the path where MRT is going to be installed, in this example: ‘/Users/daniel/Downloads/MRT’
If you already installed ‘Java’ as recommended above you will need just to confirm the automatic detection of the software according to the installation instructions.
After the installation, to open the MRT java interface you have to go to the installed folder (MRT in this case), and inside the folder ‘bin’, double click in ‘ModisTool’ terminal file; the file without extensions (the selected file in the following image). If you open the ModisTool.jar or the MRTBatch.jar, the interface will fail to read metadata of the .hdf downloaded images.

MRT IN USE: MANUAL REPROJECTION OF MODIS IMAGES:

1.- Use ‘Settings’ to establish the input and output default directory so you do not have to explore all your folders each time.
2.- Use the button ‘Open Input File’ to add all the .hdf files you need to work with. After doing this, all the associated information will be displayed in the ‘Input File Info’ textbox (see below).
3.- Select the bands needed for your particular project. In this case, we are looking for NDVI and EVI vegetation indexes.
4.- After click in ‘Specify Output File’ you will have to select an appropriate folder and a particular name for the image. Remember to add the extension of your preferred format in your name, for example: ‘08_b.tif’, by doing this, the ‘Output File Type’ box will be filled automatically.
5.- In ‘Output Projection Type’ select the appropriate projection in this case ‘Geographic’.
6.- Click in ‘Run’. All the other parameters can be explored but to obtain the basic projection you can leave them unspecified. Make sure to click ‘Run’ just one time, if you click it multiple times, the image will duplicate itself causing a weird error (i.e., an image with duplicate size with any additional information).

At the end you will obtain all the selected tiles for a particular timeframe altogether in .tiff format ready to be used in any GIS software. If an error appear in the terminal window it is probable that the images created are incomplete and it is recommended to repeat the process again.


MORE INFORMATION
REFERENCES
1. Horning N, Robinson J, Sterling E, Turner W, Spector S. Remote Sensing for Ecology and Conservation. New York: Oxford University Press; 2010.


Comentarios